A few weeks ago, we introduced the RiveQtQuickPlugin. Rive is a tool (and file format) that enables you to create interactive vector animations. With the RiveQtQuickPlugin, you can effortlessly load and display Rive animations within your QtQuick projects. For a more comprehensive understanding, please delve into our detailed blog post linked above.
In this article, we will demonstrate how to embed Rive files, use different rendering backends, load artboards and trigger animations.
Hello Rive
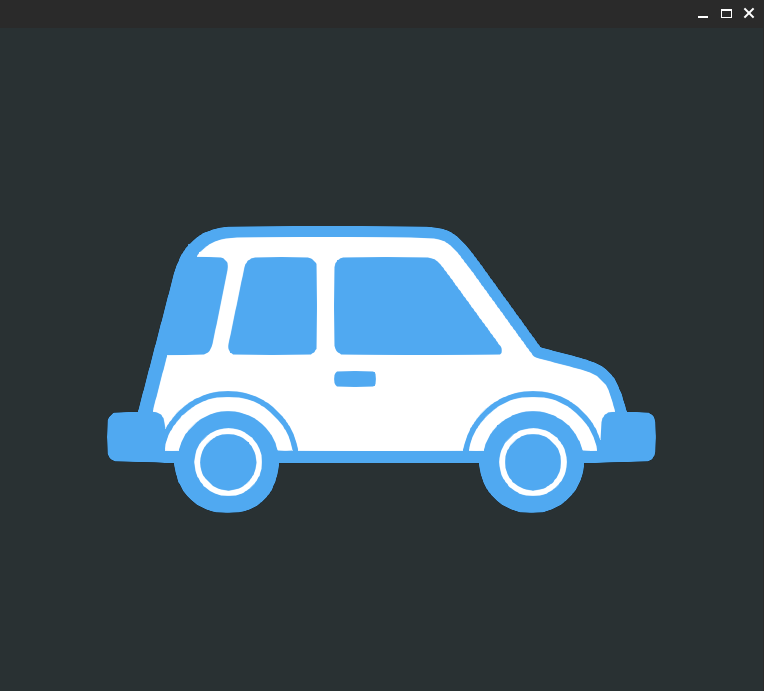
Embedding a Rive animation is as simple as showing a QtQuick Image element. The following QtQuick snippet illustrates this.
import QtQuick 2.15
import QtQuick.Window 2.12

import RiveQtQuickPlugin 1.0

Window {
    id: window

    width: 400
    height: 400
    visible: true
    color: "#293133"

    RiveQtQuickItem {
        id: riveItem
        anchors.fill: parent
        fillMode: RiveQtQuickItem.PreserveAspectFit

        // not used by software backend
        renderQuality: RiveQtQuickItem.Medium
        postprocessingMode: RiveQtQuickItem.SMAA

        fileSource: ":/assets/travel-icons-pack.riv"
    }

    Text {
        id: errorMessage
        anchors.centerIn: parent
        width: window.width
        horizontalAlignment: Text.AlignHCenter
        font.pointSize: 24
        color: "crimson"
        text: qsTr("Could not load rive file:\n") + riveItem.fileSource
        visible: riveItem.loadingStatus === RiveQtQuickItem.Error
    }

}
Here we open a Rive file that is stored in the Qt resource system.
Rendering targets
#include <QGuiApplication>
#include <QQmlApplicationEngine>
#include <QtQuick/QQuickWindow>

int main(int argc, char **argv)
{
    QQuickWindow::setGraphicsApi(QSGRendererInterface::OpenGL);

    QGuiApplication app(argc, argv);
    QQmlApplicationEngine engine("qrc:/main.qml");
    return app.exec();
}
This snippet is the C++ part to load the main qml file. QQuickWindow::setGraphicsApi(QSGRendererInterface::OpenGL); sets the graphics API to OpenGL. Change it to QQuickWindow::setGraphicsApi(QSGRendererInterface::Software); if you prefer the software backend. Alternatively, set the environment variable QSG_RHI_BACKEND to an RHI target to test the RiveQtQuickPlugin with different rendering backends.
RiveQtQuickPlugin properties
While the usage of RiveQtQuickItem is straightforward, it offers various properties to tweak the output. So let’s get back to the QML snippet and explore them further.
The fillMode property accepts three values for handling non-matching aspect ratios between the QtQuick item and the Rive scene: Stretch, PreserveAspectFit and PreserveAspectCrop. The default property is PreserveAspectFit, which maintains the scene’s aspect ratio by scaling and centering the Rive graphic. PreserveAspectCrop crops the scene at the item’s borders, Stretch stretches and warps the scene to fill the entire item.
The next two properties exclusively pertain to RHI backends, as they optimize the triangulation of vector graphics and enhance output through anti-aliasing.
The renderQuality property offers a choice of three values: Low, Medium and High. Pictures speak louder than a thousand words, so we’ll illustrate the differences with two screenshots.

As you can observe, when triangulating the shapes, a renderQuality set to High emits additional geometry, albeit at the cost of a slight performance dip.
The postprocessing property is responsible for anti-aliasing. You can configure it with one of two options: None, which signifies no anti-aliasing, or SMAA, which implements Subpixel Morphological Antialiasing as a postprocessing step. To summarize the algorithm, SMAA blends the input image with a weighted edge image, involving three additional rendering passes (edge detection pass, weighting pass and blending pass), which does come with a performance penalty. In the screenshot, you can clearly observe the jaggies when SMAA is turned off. On the right side, we present the same image with SMAA enabled. Particularly in animations, these jaggies can be quite bothersome as they lead to flickering edges between frames.

Artboards and Animations
At the core of a Rive file lies a concept called artboards. Every Rive scene consists of at least one artboard. To illustrate, let’s consider a messaging app as an example. In most modern messaging apps, users can include animated emojis. You could potentially distribute one Rive file for an animated laughing smiley, another for a beating heart, and so on. However, it’s far more convenient to consolidate these emojis into a single file and then choose the appropriate emoji at runtime. This is where artboards come in place.
Each artboard can be equipped with a variety of animations, all of which can be selected and displayed dynamically during runtime.
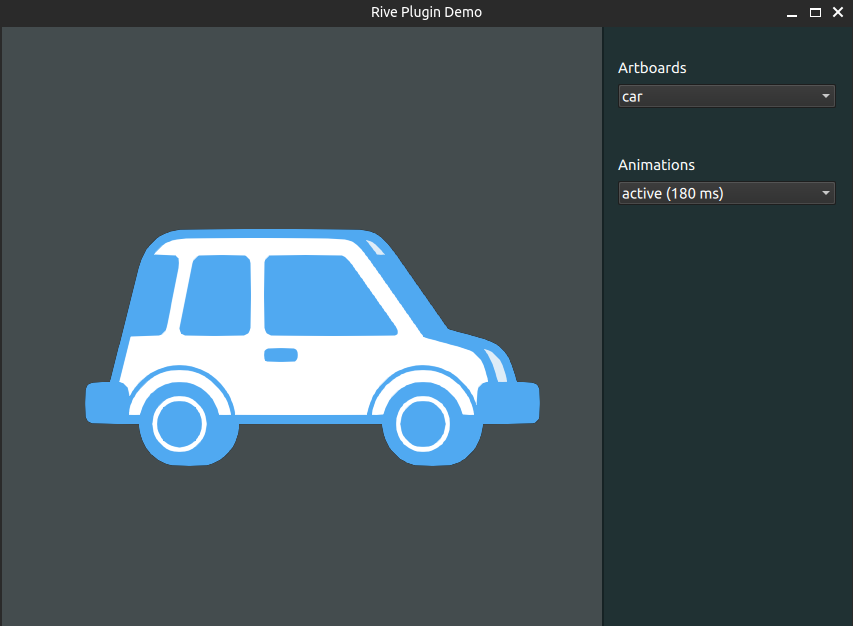
Here is the code for a minimal app to facilitate artboards and animations.
import QtCore
import QtQuick
import QtQuick.Layouts
import QtQuick.Controls

import RiveQtQuickPlugin

ApplicationWindow {
    id: window

    property int contentWidth: 600
    property int controlPanelWidth: 250

    width: contentWidth + controlPanelWidth
    height: 600
    visible: true
    color: "#444c4e"

    title: qsTr("Rive Plugin Demo")

    Item {
        id: content
        anchors {
            top: parent.top
            bottom: parent.bottom
            left: parent.left
            right: controlPanel.left
        }

        RiveQtQuickItem {
            id: riveItem
            anchors.fill: parent
            fillMode: RiveQtQuickItem.PreserveAspectFit

            // not used by software backend
            renderQuality: RiveQtQuickItem.Medium
            postprocessingMode: RiveQtQuickItem.SMAA

            fileSource: ":/assets/travel-icons-pack.riv"
        }

        Text {
            id: errorMessage
            anchors.centerIn: parent
            width: window.width
            horizontalAlignment: Text.AlignHCenter
            font.pointSize: 24
            color: "crimson"
            text: qsTr("Could not load rive file:\n") + riveItem.fileSource
            visible: riveItem.loadingStatus === RiveQtQuickItem.Error
        }

        DropArea {
            id: dropArea
            anchors.fill: parent
            onEntered: {
                drag.accept(Qt.LinkAction)
            }
            onDropped: {
                riveItem.fileSource = drop.urls[0].toString().slice(7)
            }
        }
    }

    Rectangle {
        id: controlPanel

        anchors {
            top: parent.top
            bottom: parent.bottom
            right: parent.right
        }

        width: controlPanelWidth

        color: "#203133"

        Rectangle {
            id: separator
            anchors {
                top: parent.top
                bottom: parent.bottom
                left: parent.left
            }
            width: 2
            color: "black"
            opacity: 0.3
        }

        Column {
            id: column

            anchors {
                fill: parent
                leftMargin: 16
                rightMargin: 16
                topMargin: 32
            }

            spacing: 8

            Label {
                width: parent.width
                wrapMode: Label.Wrap
                horizontalAlignment: Qt.AlignLeft
                text: qsTr("Artboards")
            }

            ComboBox {
                model: riveItem.artboards.map(artboard => artboard.name)
                anchors.left: parent.left
                anchors.right: parent.right

                onActivated: (index) => riveItem.currentArtboardIndex = index
            }

            Item { width: 1; height: 32 }

            Label {
                width: parent.width
                wrapMode: Label.Wrap
                horizontalAlignment: Qt.AlignLeft
                text: qsTr("Animations")
            }

            ComboBox {
                model: riveItem.animations.map(animation => `${animation.name} (${animation.duration} ms)`)
                anchors.left: parent.left
                anchors.right: parent.right

                onActivated: (index) => riveItem.currentAnimationIndex = index
            }

        }

    }

}
When the app is launched, it begins by loading a basic Rive file. Also, users are able to drag and drop a Rive file onto the window. To access the different artboards and animations, the user can utilize the comboboxes situated on the right-hand side.
All available artboards and animations can be conveniently accessed through the artboard and animation properties. You can create a mapping of artboards (animations) to their respective names and bind these names to the model property of the ComboBox. Changing the current artboard (animation) is as straightforward as setting the current index.
Conclusion
After reading this blog post, you should be able to integrate Rive animations in your applications. We demonstrated the use of software and GPU-accelerated backends and how to switch between artboards and animations. Stay tuned for future blog posts when we present further capabilities you can unlock with the RiveQtQuickPlugin.